This simple guide has been built for those who have just bought a new sewing machine, or for those who are looking through your sewing box and thinking, ‘I got this foot with my machine and hey, i have no idea what it actually does’. I’m going to give you a quick run-through to the feet that i use the most and what their purpose is.
There will be examples of the use of all of these sewing machine feet in some upcoming tutorials I am working on, to be published over the course of the summer!
Included in this guide is:
• ZigZag • Standard Zipper • Invisible Zipper • Teflon • Freemotion Embroidery •
– – – – – – – – – – – – – – – – – – – – – – – – – – – – – – – – – – – – – – –
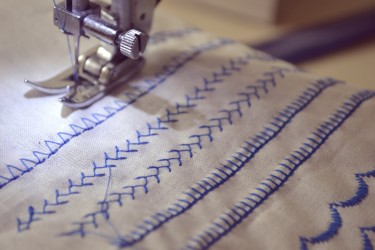
ZigZag foot
Also referred to as the all-purpose foot, this is your go-to foot, suitable for most basic stitching jobs! The zigzag foot has a wide gap so that your needle can dance around to create wide zigzag stitches. There are other purposes too including decorative stitches and some garment stitches too. This foot is perfect for stitches for edges, (for attaching elastics, for example) and even blind-hem with this foot if you don’t have an actual blind-hem foot. Above is a little selection of some of the stitches I have achieved on my machine with this foot.
– – – – – – – – – – – – – – – – – – – – – – – – – – – – – – – – – – – – – – –
Standard Zipper foot
This foot allows your needle to get super close to your zip teeth; without this foot you would really struggle to sew in zips of any kind, because if you send your zip teeth under your zig zag presser foot, nothing will stay straight! By eliminating half the foot, you can get extremely close to the teeth. Great for topstitching zips too. You can learn more about inserting a zip, in a blog post I’m publishing later this summer.
– – – – – – – – – – – – – – – – – – – – – – – – – – – – – – – – – – – – – – –
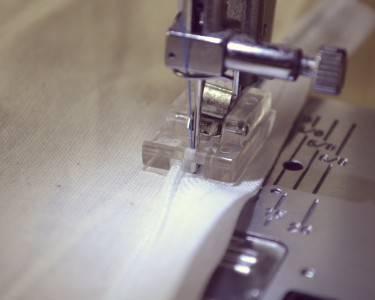
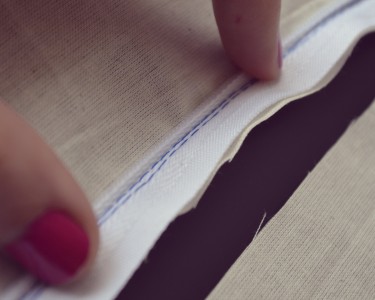
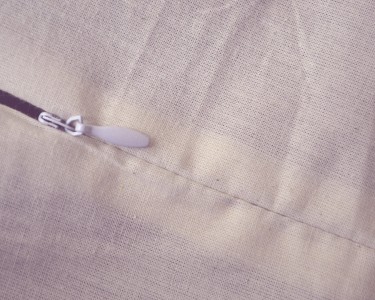
Invisible Zipper Foot
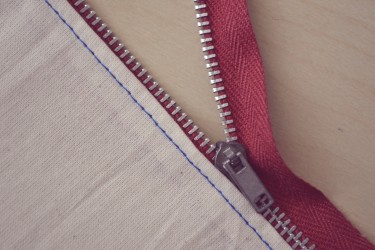
Invisible zippers are popular on garments, but my favourite use for these types of zips are cushions. A well inserted invisible zip will look very professional. Be sure to buy a good quality zip, or all of your practice sewing them in perfectly will go to waste! Cheap zips can sometimes pull apart slightly at the teeth when under tension, revealing a nylon smile between your seam- not what you want!
You can see by my images, you have to get super close to the teeth. It’s very different to a standard zipper insertion, so if you have never looked up close at an invisible zip, the images won’t make a lot of sense! The foot pushes the teeth backwards so that your stitch line ends up right up close to the teeth.
– – – – – – – – – – – – – – – – – – – – – – – – – – – – – – – – – – – – – – –
Teflon Foot
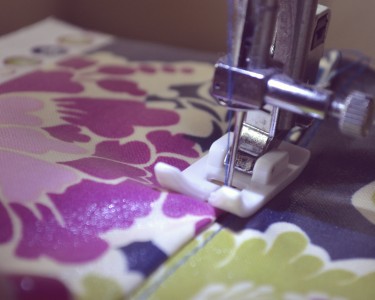
An all-white, plastic foot. Comes in ZigZag and Zipper foot style, and probably many more i haven’t yet discovered. This foot is designed to be used on fabrics such as leathers and laminates (including Oilcloths). As the Teflon brand name suggests, it’s non-stick. Having your zipper foot stick to your laminated fabric can be a real pain, so this foot was designed to just glide over the fabric as if it’s cotton.
Neat Trick: If you don’t have a teflon foot, but have a spare zigzag foot, just cover the bottom of it in Washi/masking tape, Trim close to the edge and poke all the holes of the foot into the tape, and it works in exactly the same way. I would suggest keeping this DIY Teflon foot seperate though, as using it on cotton will eventually wear away the tape and it will become sticky. The tape does do this anyway with time, but better to prolong the life and keep them for their own jobs!
– – – – – – – – – – – – – – – – – – – – – – – – – – – – – – – – – – – – – – –
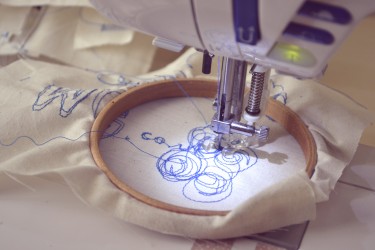
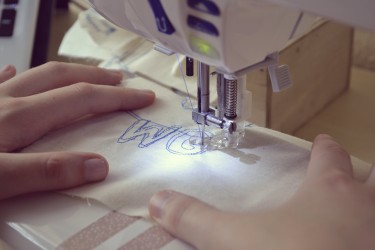
Freemotion Embroidery Foot
Everyone should try using this foot! Not usually a standard with machines, but worth the purchase price for sure. The freemotion foot achieves just that – free motion! By lowering the feed dogs, You can use the needle and thread like pen and ink to create your own stitchy sketches on fabric. Be sure to use a firm woven fabric, interface if needed, and place in an embroidery hoop for extra stability, especially if you are a newbie. If you want to be a little more strategic with your stitches, use a vanishing marker to draw your design onto your fabric, then stitch over! Be sure to test the market on a small piece of fabric first, however. If you are using a fragile (or crazy) fabric, you can use a stabiliser underneath which is like a cottony-papery type thing you can then pull away after. You sometimes find these still stuck inside an embroidered polo shirt.
– – – – – – – – – – – – – – – – – – – – – – – – – – – – – – – – – – – – – – –
William Gee supply sewing machine accessories available here. If you have any other neat tricks, hints or tips you would like to share with the community, do leave a comment below.


 We’re thrilled to announce that we’ve partnered with Tree Nation, the platform to reforest the world & fight climate change! Home to over 90 planting projects in 33 countries, Tree Nation is a non-profit organisation that helps people & companies offset their CO2 emissions.